Table of Contents
Introduction
The first time my daughter asked for a Barbie cake for her birthday, I felt a mixture of excitement and pure terror. There I was, a mom with basic baking skills, suddenly tasked with creating what seemed like an architectural masterpiece. The pressure was on—this wasn’t just any dessert; it was going to be the centerpiece of my little girl’s special day, and I didn’t want to disappoint those hopeful eyes.
That was five years ago. Since then, I’ve created over 30 Barbie cakes—not just for my daughter but for nieces, friends’ children, and even as commissioned pieces for local celebrations. What started as an intimidating challenge has become one of my most treasured creative outlets and a small side business that brings joy to countless birthday parties.
In this comprehensive guide, I’m sharing everything I’ve learned on my journey from nervous novice to confident Barbie cake creator. Whether you’re a first-timer trying to fulfill your child’s birthday wish or someone looking to perfect your technique, these insights will help you create a show-stopping Barbie cake that makes the birthday girl feel like royalty.
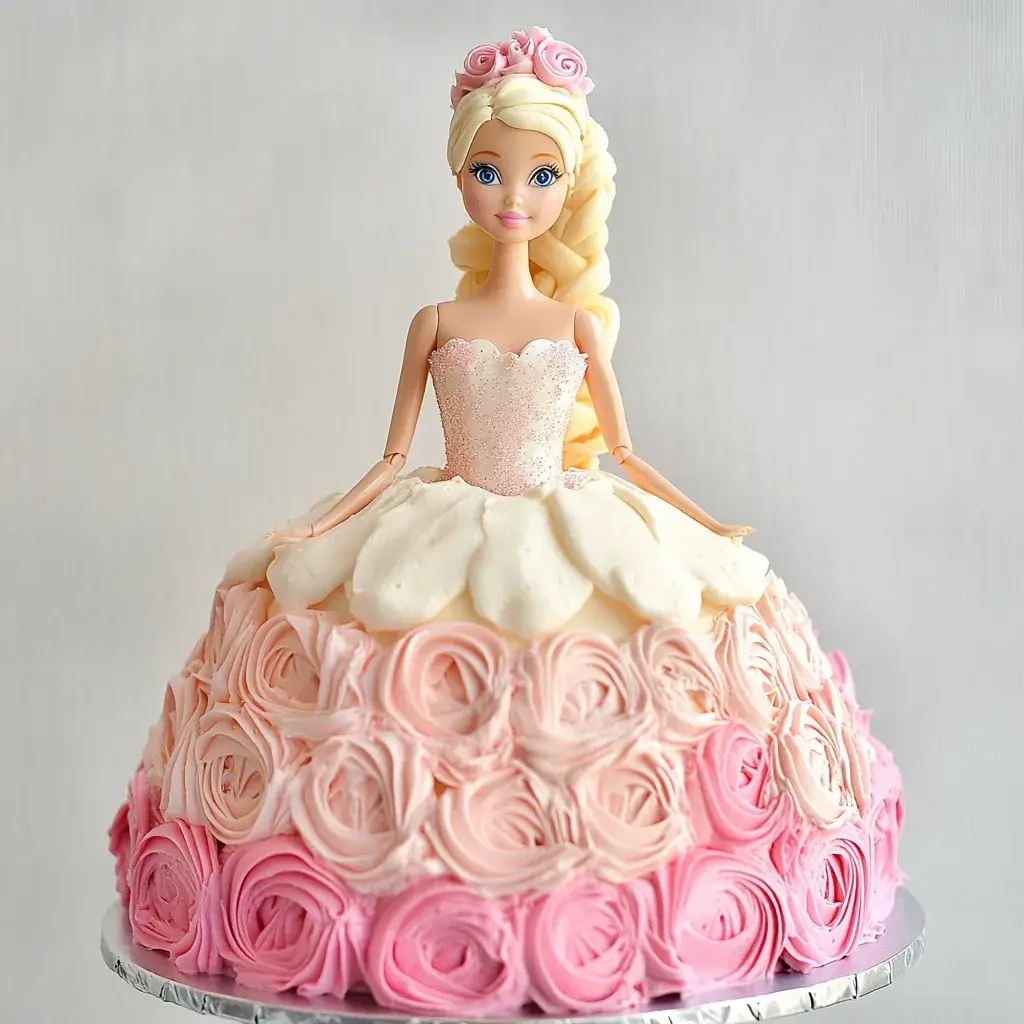
Understanding the Magic Behind a Perfect Barbie Cake
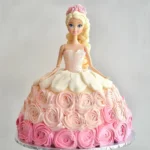
Before diving into techniques and recipes, it’s important to understand what makes a Barbie cake so special. Unlike standard sheet cakes or even character cakes, a Barbie cake (also called a doll cake or princess cake) transforms an ordinary dessert into a three-dimensional creation that sparks imagination and wonder.
At its core, a Barbie cake features a doll torso emerging from a cake that forms her voluminous “dress.” When done well, the transition between doll and cake is seamless, creating the illusion that Barbie is wearing an elaborate, edible gown. It’s this magical transformation that captivates children and creates those precious wide-eyed moments of birthday delight.
The Psychology Behind Why Kids (and Adults) Love Barbie Cakes
Through my years of creating these cakes, I’ve noticed that their appeal goes beyond just looking pretty. Barbie cakes tap into several powerful elements:
- They blur the line between toy and food, creating an exciting sensory experience
- They personalize the celebration in a way that store-bought cakes rarely achieve
- They represent thoughtfulness and effort that children intuitively recognize and appreciate
- They create a memorable focal point that elevates the entire party experience
Understanding these emotional drivers helped me focus on what matters most when creating these cakes—it’s not about professional-level perfection but about creating magic, memories, and moments of joy.
Moving Beyond Pinterest Perfectionism
One of my earliest and most important lessons was letting go of Pinterest perfectionism. Those flawless, fondant-covered masterpieces created by professional pastry chefs are stunning but can be deeply intimidating to beginners.
I’ve learned that children don’t care about fondant smoothness or perfect color matching—they care about the wow factor and the personal touches. Some of my most “technically imperfect” cakes received the most enthusiastic reactions simply because they incorporated the birthday girl’s favorite colors or unique interests.
This perspective shift freed me to enjoy the process rather than stress over every detail, and ironically, it led to better results as my confidence grew.
Essential Equipment That Won’t Break Your Budget
When I started making Barbie cakes, I assumed I needed specialized, expensive equipment. After many cakes, I’ve discovered what’s truly essential and what’s simply nice to have. Here’s my tried-and-true equipment list for successful Barbie cake creation:
The Non-Negotiable Basics
These items form the foundation of successful Barbie cake baking:
- Wonder Mold Pan or Domed Bowl Set: While specialized “doll cake” pans exist, I’ve found that any oven-safe domed bowl works well. I started with a Pyrex bowl and later invested in a Wonder Mold pan ($15-20) once I knew this wasn’t a one-time project.
- Serrated Knife: Essential for leveling cakes and carving shapes. You don’t need anything fancy—my $8 bread knife has served me perfectly.
- Offset Spatula: This tool changed my frosting game completely. The angled blade makes it much easier to create smooth surfaces and reach awkward spots.
- Piping Bags and Tips: At minimum, get a set with round, star, and leaf tips. I recommend reusable bags for environmental and cost reasons.
- Turntable: This doesn’t need to be expensive—my first was just a lazy Susan from my kitchen cabinet! A proper decorating turntable makes a huge difference in achieving smooth frosting.
Barbie Selection Matters More Than You Think
Not all dolls work equally well for Barbie cakes. Through trial and error, I’ve discovered:
- Classic Barbie dolls work better than specialty themed dolls due to their proportions
- Look for dolls with removable legs (they’re easier to insert into cakes and require less cake height)
- Torso-only “pick” dolls exist specifically for cake decorating, though using a full doll that can be cleaned and kept afterward feels more special to most children
- Consider using a new doll that becomes a gift after the cake is served
I always wrap the doll’s lower body in plastic wrap before inserting it into the cake. This keeps the doll clean and allows it to be played with after the celebration.
Unexpected Items That Became Essential
Some of my most useful cake-making tools weren’t designed for baking at all:
- Clean paint brushes: Perfect for applying food coloring for detailed work
- Dental floss: The best tool for perfectly slicing cake layers
- Toothpicks: Essential for stabilizing layers and testing doneness
- Paper towel tubes: Cut and covered in foil, they provide internal support for taller designs
These household items have saved numerous cakes and cost almost nothing.

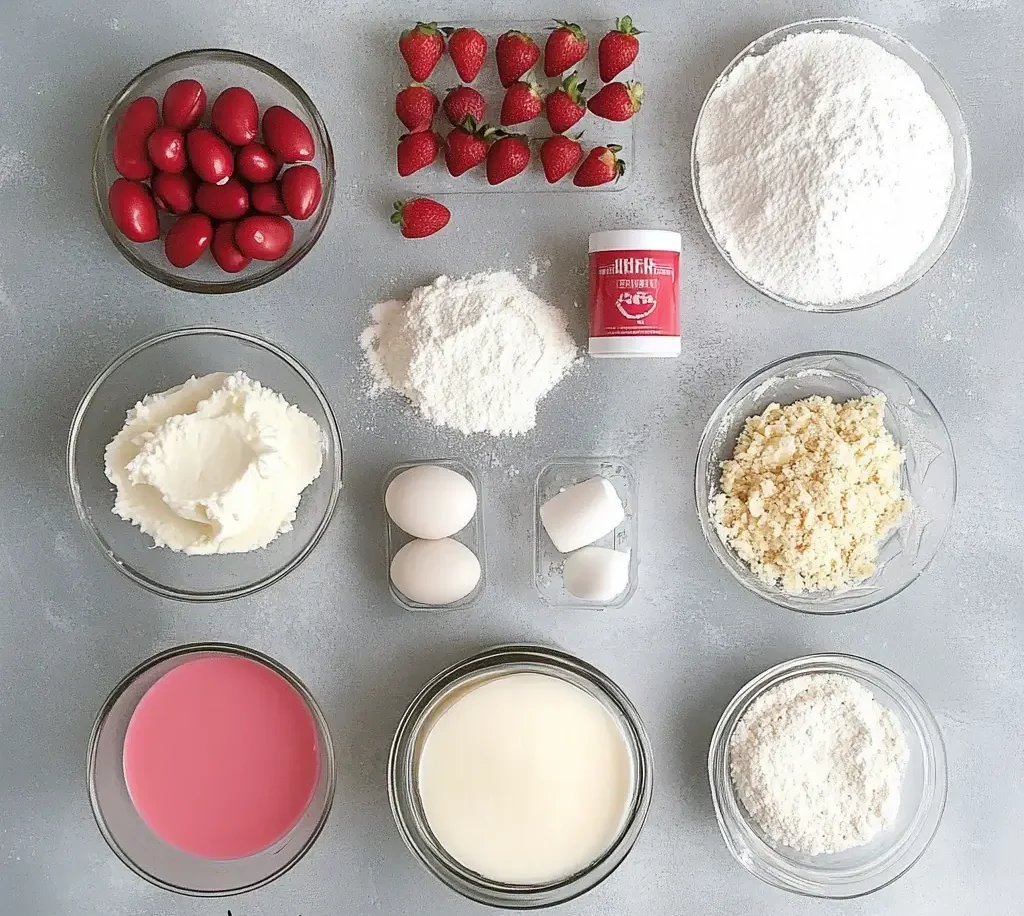
Foolproof Cake Recipes That Actually Hold Their Shape
Not all cake recipes work well for sculptural cakes. After numerous trials (and some spectacular collapses), I’ve identified the cake varieties that consistently perform well for Barbie cakes:
The Perfect Balance: Moist Yet Structural
The ideal Barbie cake recipe must strike a balance between being delicious and maintaining structural integrity. These recipes have never failed me:
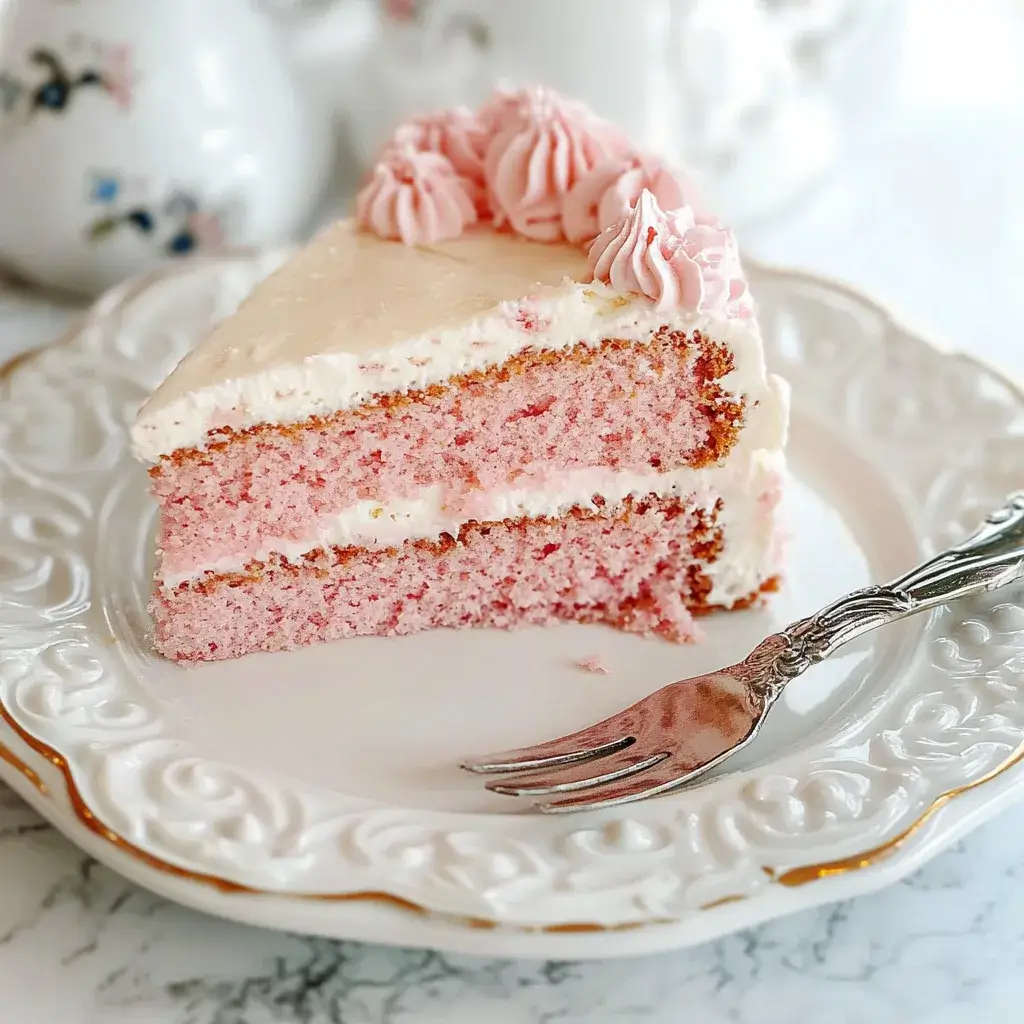
Classic Vanilla Butter Cake This recipe creates a cake dense enough to carve yet moist enough to enjoy:
- 3 cups all-purpose flour
- 2 1/2 teaspoons baking powder
- 1/2 teaspoon salt
- 1 cup unsalted butter, room temperature
- 2 cups granulated sugar
- 4 large eggs
- 1 tablespoon vanilla extract
- 1 cup whole milk
Cream butter and sugar until fluffy (about 5 minutes—don’t shortcut this step!). Add eggs one at a time, then vanilla. Alternate adding dry ingredients and milk. Bake at 350°F in prepared pans until a toothpick comes out clean.
Dense Chocolate Cake For chocolate lovers, this recipe holds shape remarkably well:
- 2 cups all-purpose flour
- 3/4 cup unsweetened cocoa powder
- 1 1/2 teaspoons baking soda
- 3/4 teaspoon salt
- 3/4 cup butter, room temperature
- 2 cups sugar
- 3 large eggs
- 2 teaspoons vanilla extract
- 1 1/2 cups buttermilk
Combine using the same method as above. The buttermilk adds moisture without sacrificing structure.
The Freezer: Your Secret Weapon
One game-changing technique I’ve discovered is partially freezing cakes before carving and decorating. Benefits include:
- Firmer cakes that hold their shape during cutting
- Reduced crumbing when applying frosting
- Ability to prepare components days in advance
- Moisture gets sealed in during the freezing process
I typically bake my cakes 2-3 days before assembly, wrap them well once cooled, and freeze them. I remove them about 30-45 minutes before carving—they should be firm but not frozen solid.
Adjusting Recipes for Different Climates and Seasons
Living in an area with hot, humid summers taught me that recipes need seasonal adjustments. During summer months:
- I reduce liquid by 2-3 tablespoons
- I increase flour by 2 tablespoons
- I keep the mixing bowl and ingredients chilled
- I use buttercream with a higher ratio of shortening to butter
In winter, I do the opposite, adding slightly more liquid to prevent dryness.
The Art of Construction: Building Your Barbie Cake
With ingredients and equipment ready, the construction phase begins. This is where creativity meets engineering, and I’ve developed a step-by-step approach that minimizes stress and maximizes success.
Baking Schedule That Prevents Last-Minute Panic
The biggest mistake I made as a beginner was trying to do everything in one day. Now I follow this stress-free timeline:
2-3 Days Before:
- Bake all cake layers
- Cool completely
- Wrap tightly in plastic wrap
- Freeze
1 Day Before:
- Prepare frostings and fillings
- Color any fondant or modeling chocolate
- Make decorative elements that need time to dry (flowers, etc.)
Day of Assembly (At Least 5 Hours Before Party):
- Remove cakes from freezer
- Carve and stack while still slightly frozen
- Crumb coat and chill
- Apply final frosting layer
- Insert doll and decorate
- Allow cake to come to room temperature for at least 2 hours before serving
This schedule eliminates rushing and allows time to solve any unexpected challenges.
Structural Techniques That Prevent Cake Collapse
Nothing is more heartbreaking than a collapsing cake. These structural techniques have saved me countless times:
The Dowel Method: Insert 3-4 wooden dowels vertically through all layers of stacked cakes. Trim them to be flush with the top layer. This creates an internal skeleton that prevents shifting.
The Cardboard Round: Place a cardboard cake round between layers for stability, especially if you’re doing a multi-tiered dress design.
The Cone Technique: For especially tall or elaborate designs, I create a cone of cardboard covered in foil to insert into the center of the cake. This reduces weight and provides a stable core.
The Gentle Push Test: Before inserting the doll, I gently press on the sides of the cake. If there’s any give or instability, I add additional support before proceeding.
H3: Inserting the Doll: Timing and Technique
The moment of doll insertion deserves special attention:
- Wrap the doll’s lower half in plastic wrap (including legs if using a full doll)
- Create a perfectly sized hole for the doll using a clean cup or small bowl as a guide
- Insert the doll only after the crumb coat has set but before the final decorative layer
- Adjust the doll’s depth so her waist sits at the top of the cake
- Apply frosting to create a seamless transition between the doll’s bodice and the cake “dress”
For dolls with particularly wide hips, I sometimes create a slightly wider opening at the top that narrows as it goes down, then fill any gaps with frosting.

Decorating Techniques That Transform Ordinary Into Extraordinary
Decoration is where your Barbie cake truly comes alive. Through years of experimentation, I’ve developed techniques that create stunning results without requiring professional skills.
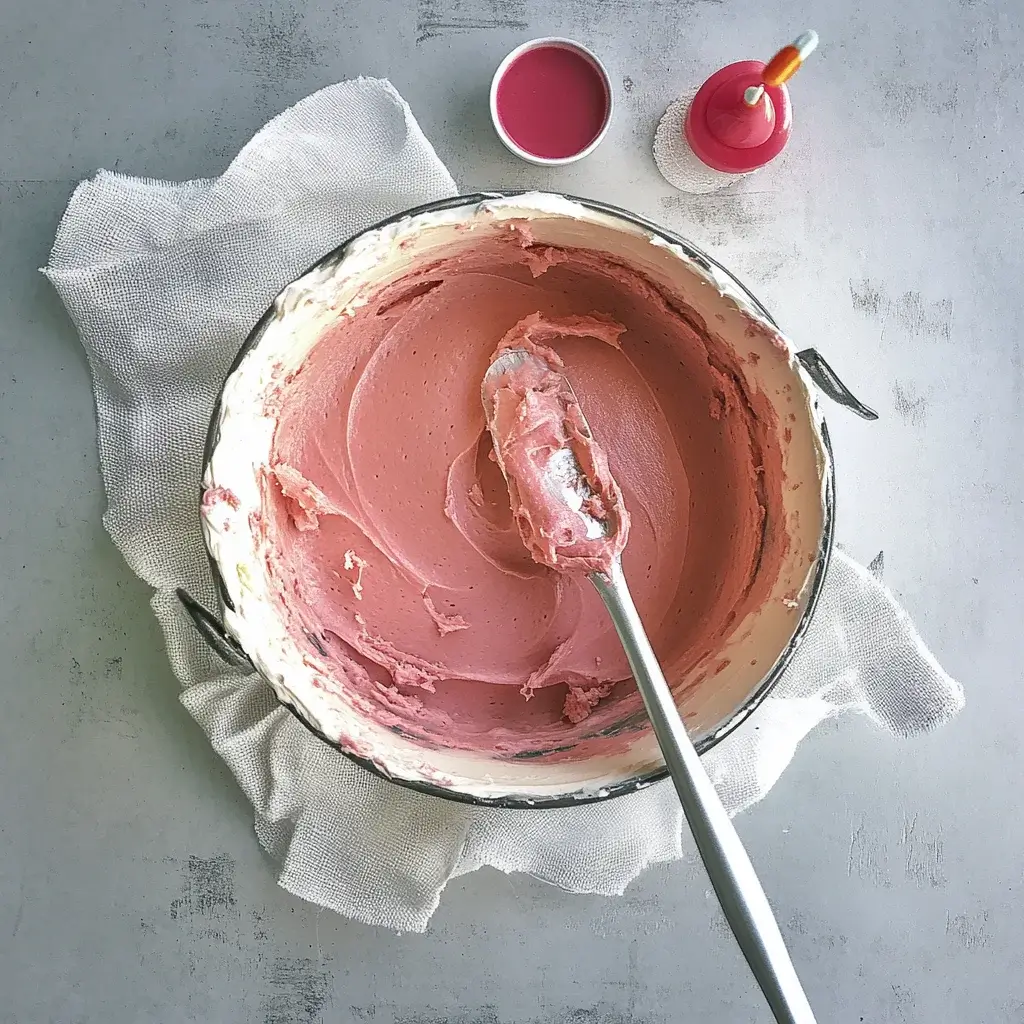
Buttercream vs. Fondant: Making the Right Choice
Both frosting types have advantages:
Buttercream Pros:
- Generally preferred taste
- Easier for beginners
- Forgiving of mistakes (can be smoothed repeatedly)
- Works well in any climate
- Creates beautiful textured designs
Fondant Pros:
- Creates a perfectly smooth finish
- Allows for more elaborate decorative elements
- Provides a canvas for detailed work
- Can be prepared days in advance
- Holds up better in warm environments
My solution is often a hybrid approach: covering the cake in smooth buttercream, then adding fondant accents for detail. This gives the best of both worlds—good taste and beautiful decoration.
Piping Techniques That Create “Wow” Factor
Piping is my favorite way to create elaborate-looking dress details without advanced skills:
The Ruffle Skirt: Using a petal tip (#104), pipe rows of overlapping ruffles starting from the bottom. This creates a cascading, fabric-like effect that looks much more difficult than it is.
The Rosette Dress: Using a star tip (#1M), pipe swirled rosettes across the entire dress. This technique is extraordinarily forgiving—any imperfections simply look like fabric texture.
The Ombré Effect: Prepare frosting in 3-4 gradually darkening shades of the same color. Pipe horizontal rows starting with the darkest shade at the bottom, gradually working to the lightest at the top. This modern technique creates stunning dimension.
The Basketweave: Using a basketweave tip (#47), create an interlaced pattern that resembles woven fabric. This works beautifully for more sophisticated princess designs.
Edible Embellishments Worth The Investment
Certain decorative elements elevate Barbie cakes from homemade to jaw-dropping:
Edible Pearls and Dragées: These pre-made sugar or chocolate pearls add elegant touches to dress details. I use them to outline seams, create necklaces, or embellish hemlines.
Edible Glitter and Luster Dust: Applied with a dry brush, these add magical sparkle to finished cakes. For more intense color, mix luster dust with clear extract to create an edible “paint.”
Edible Flowers: Whether piped from buttercream, molded from fondant, or purchased pre-made, flowers transform a simple design into something special. I keep a supply of pre-made fondant roses in my freezer for last-minute additions.
Chocolate Wraps: Melted chocolate piped onto parchment paper in lace patterns, then wrapped around the cake once set, creates a gorgeous lattice effect that looks incredibly professional.
Problem-Solving Strategies From a Veteran Barbie Cake Maker
Even with perfect preparation, challenges arise. These solutions have rescued countless cakes:
Bulging Sides: The Quick Fix
If you notice your cake sides bulging:
- Insert wooden skewers at an angle from top to bottom around the perimeter
- Chill the cake for 30 minutes
- Remove skewers and fill holes with matching frosting
This temporary support allows the frosting to set and hold the shape.
Collapsing Layers: Rescue Techniques
If layers begin separating or sliding:
- Remove the doll carefully
- Insert 4-5 wooden dowels vertically through all layers
- Refrigerate for 1 hour
- Re-insert the doll
- Touch up frosting as needed
For emergency situations, I’ve even used drinking straws as impromptu dowels—they’re not ideal but can save a cake in crisis.
Frosting Disasters: Salvage Strategies
When frosting issues occur:
- Crumbs in frosting: Apply a thin crumb coat, chill for 20 minutes, then apply the final coat
- Buttercream too soft: Add powdered sugar 1 tablespoon at a time; chill cake briefly
- Buttercream too stiff: Add milk or cream 1 teaspoon at a time
- Melting in heat: Add 1/4 cup shortening to your buttercream recipe and keep cake refrigerated until 1-2 hours before serving
For truly unfixable frosting issues, decorative elements strategically placed can hide a multitude of problems!
Taking Your Barbie Cake to the Next Level: Advanced Tips
Once you’ve mastered the basics, these advanced techniques create truly extraordinary cakes:
Custom Theming Beyond Basic Barbie
While traditional pink princess Barbie cakes are beloved classics, customizing to the birthday girl’s interests makes them truly special:
- Profession Themes: I’ve created Barbie doctor, astronaut, chef, and scientist cakes, each with themed decorations reflecting her career
- Hobby Showcase: For a sports-loving birthday girl, I designed a Barbie with a tennis skirt cake complete with racket and court details
- Favorite Color Schemes: Moving beyond pink to favorite colors makes each cake uniquely personal
- Seasonal Variations: Winter princess cakes with snowflake details or summer Barbies with tropical themes add timely relevance
My most requested creation was a “Barbie at the Ball Game” cake for a baseball-loving little girl—Barbie wore the team colors, and the cake featured baseball decorations.
Incorporating Personal Elements That Create Meaning
The most memorable cakes incorporate elements significant to the birthday child:
- Use actual ribbons from dance recitals as inspiration for fondant ribbons
- Recreate miniature versions of favorite toys as cake toppers
- Include tiny fondant replicas of pets
- Match dress designs to the birthday girl’s actual party dress
These personal touches transform a pretty cake into a meaningful keepsake that shows how well you know and love the birthday child.
Photography Tips That Capture Your Creation
After putting so much effort into your Barbie cake, proper photography preserves the memory:
- Photograph in natural light when possible
- Capture photos from multiple angles, especially eye-level
- Take close-ups of intricate details
- Include shots of the birthday girl’s reaction
- Consider a time-lapse of the cutting ceremony
I create a small photo book of each year’s cake to preserve the memory and provide inspiration for future creations.
Creating Inclusive Barbie Cakes for Every Child
As my Barbie cake journey evolved, so did my awareness of the importance of representation and inclusivity in children’s celebrations.
Diverse Doll Selection for Authentic Representation
Modern Barbie lines offer wonderful diversity that allows every child to see themselves represented:
- I maintain a collection of dolls with different skin tones, hair textures, and facial features
- When making a cake for a specific child, I try to choose a doll that resembles them when possible
- For children with disabilities, Barbie’s inclusive line offers dolls with prosthetic limbs, wheelchairs, and more that can be incorporated
The joy on a child’s face when they see a cake featuring a doll that looks like them is absolutely priceless and worth every extra effort to get right.
Dietary Adaptations Without Sacrificing Beauty
Special dietary needs shouldn’t mean boring cakes:
- Gluten-Free: I use King Arthur Measure for Measure flour as a 1:1 replacement in my standard recipes
- Dairy-Free: Substituting plant-based butter and milk works perfectly in most recipes
- Egg-Free: Applesauce or commercial egg replacers maintain moisture and structure
- Nut-Free: Almond extract can be replaced with vanilla bean paste for depth of flavor
- Vegan: Combining the above substitutions creates fully vegan options that still hold their shape
I always conduct a trial run when baking with new substitutions to ensure structural integrity, especially for complex designs.
Cultural Variations That Celebrate Heritage
Some of my most meaningful creations have incorporated cultural elements important to the birthday child:
- Traditional dress designs from various cultures
- Color schemes significant to cultural celebrations
- Incorporating symbolic patterns or decorations
- Adding miniature flags or emblems
These culturally meaningful cakes not only delight the birthday child but educate guests about diverse traditions in a joyful context.
Barbie Cake Economics: From Cost-Saving to Profit-Making
What started as a labor of love for my daughter became a small side business. Whether you’re baking on a budget or considering monetizing your skills, these insights prove valuable:
Budget-Friendly Strategies That Don’t Compromise Quality
Creating beautiful Barbie cakes needn’t break the bank:
- Buy in bulk: Ingredients like flour, sugar, and butter freeze well
- Invest strategically: Put money into reusable tools rather than single-use decorations
- Stock up during sales: Wilton and other brands regularly discount baking supplies
- Join baking groups: Many decorators trade or sell supplies they no longer need
- Use supermarket cake mixes strategically: Doctor them with extra eggs, butter instead of oil, and milk instead of water for improved structure and taste
My most budget-friendly hack is using a cake mix for the internal structure layers and scratch-made cake for the visible outer layers.
Time Management Techniques for Busy Bakers
Creating beautiful cakes as a busy mom, professional, or student requires efficient techniques:
- Prepare and freeze cake layers up to a month in advance
- Make decorative elements during downtime while watching TV
- Set up a dedicated decorating space to eliminate setup/cleanup time
- Create templates for recurring designs
- Maintain an organized inventory of supplies
These efficiency strategies reduced my active working time from 8+ hours to about 3-4 hours per cake.
From Hobby to Home Business: My Journey
For those considering turning their Barbie cake skills into income:
- Begin by calculating your true costs, including ingredients, utilities, wear on equipment, and your time
- Start with friends and family to build a portfolio of photos
- Create business pages on social media platforms to showcase your work
- Consider cake tastings for potential clients
- Research local cottage food laws or commercial kitchen requirements
What began as my daughter’s birthday request has evolved into a fulfilling creative outlet that generates about $500 monthly in extra income—an unexpected but welcome development in my Barbie cake journey.
Conclusion: The Joy Beyond the Frosting
As I look back on my Barbie cake evolution—from terrified beginner to confident creator—I realize the journey brought rewards far beyond learning baking techniques.
Each cake represented not just flour, sugar, and butter but hours of thoughtful planning centered around making a child feel special. The skills I developed transferred to other areas of my life: problem-solving under pressure, creative thinking, and finding joy in creating experiences rather than just things.
Most importantly, I discovered that perfection isn’t the goal—connection is. The slightly lopsided cake that perfectly matched a child’s favorite color scheme brought more joy than any technically flawless creation ever could.
Whether you’re making your first Barbie cake or your fiftieth, remember that beneath the frosting and fondant lies the real magic: the love that inspired you to create something special, the memories you’re building with each celebration, and the tradition you’re establishing that may continue for generations.
So gather your ingredients, wrap that Barbie in plastic, and prepare to create not just a cake but a moment of wide-eyed wonder that neither you nor the birthday girl will ever forget.
Have you created a Barbie cake or are you planning to tackle one soon? I’d love to hear about your experience in the comments below!
Print
Best Barbie Cake Guide: Steps to Perfect in less 1h
- Total Time: 55 minutes
- Yield: 12 servings 1x
Description
This Barbie cake is the ultimate show-stopping dessert for birthdays and celebrations. With its elegant doll centerpiece and delicious layers of moist cake and buttercream, it’s surprisingly easy to make in under an hour. Whether you’re throwing a themed party or just want to make someone smile, this cake is as magical as it is delicious.
Ingredients
For the Cake:
-
2 (9-inch) round vanilla cakes (store-bought or homemade)
-
1 dome-shaped cake (baked in a bowl or Bundt pan)
-
1 Barbie or fashion doll (wrapped in plastic wrap from the waist down)
For the Buttercream Frosting:
-
1 ½ cups (340g) unsalted butter, softened
-
5 cups (600g) powdered sugar
-
3–4 tablespoons heavy cream or milk
-
1 tablespoon vanilla extract
-
Pink food coloring (gel preferred)
Optional Decorations:
-
Edible glitter
-
Sprinkles
-
Fondant flowers or bows
-
Piping bags with star and petal tips
Instructions
-
Prepare the Base: Stack the two 9-inch cakes with a layer of frosting in between. Place the dome cake on top to form the dress shape.
-
Carve the Shape: Trim the sides to smooth the dress shape if needed. Create a hole in the center for the doll.
-
Insert the Doll: Wrap the doll’s lower half in plastic wrap and insert it into the center of the cake.
-
Make the Buttercream: In a large bowl, beat butter until creamy. Add powdered sugar gradually, mixing on low. Add vanilla and cream until fluffy. Tint with pink food coloring.
-
Frost the Cake: Apply a crumb coat and chill for 15 minutes. Then frost with a thicker layer, smoothing the surface.
-
Decorate: Use piping tips to design ruffles, flowers, or patterns on the “dress.” Add fondant or sprinkles as desired.
-
Chill & Serve: Refrigerate for 20 minutes before serving for cleaner slices. Enjoy!
Notes
-
You can use any flavor of cake or color scheme to match your Barbie theme.
-
Use a serrated knife for carving smooth curves.
-
If pressed for time, use store-bought cakes and frosting and focus on decoration.
- Prep Time: 30 minutes
- Cook Time: 25 minutes
- Category: Dessert
- Method: Baking
- Cuisine: American
Nutrition
- Serving Size: 1 slice
- Calories: 480
- Sugar: 42g
- Sodium: 190mg
- Fat: 26g
- Saturated Fat: 15g
- Unsaturated Fat: 10g
- Trans Fat: 0g
- Carbohydrates: 58g
- Fiber: 1g
- Protein: 3g
- Cholesterol: 85mg
Keywords: Barbie cake, birthday cake, doll cake, themed cake, pink cake